Busty T-shirt Alterations
10/26/2023
I'm busty. A quick look through our website and you'll see a fair amount of discussion on boobs, bra fit, and the importance of having a good foundation garment. (Bra Sewing articles found here, bra shopping article found here, and a blog post about bra cups in dresses here.)
Something that I personally am overly conscious about is the fit of T-shirts, because they generally aren't designed with busty people in mind. Being somewhere around a (USA) size 18/20, most "feminine cut" shirts don't come large enough and when I finally do get a circumference that will go around my bust, the shoulders are obnoxiously large because shirts are typically proportioned for "men" or a "unisex" fit (which means no boobs). I shop almost exclusively at Torrid because I love the fit of their t-shirts, but some circumstances in life are best suited with a t-shirt for the occasion, like your son graduating from bootcamp.
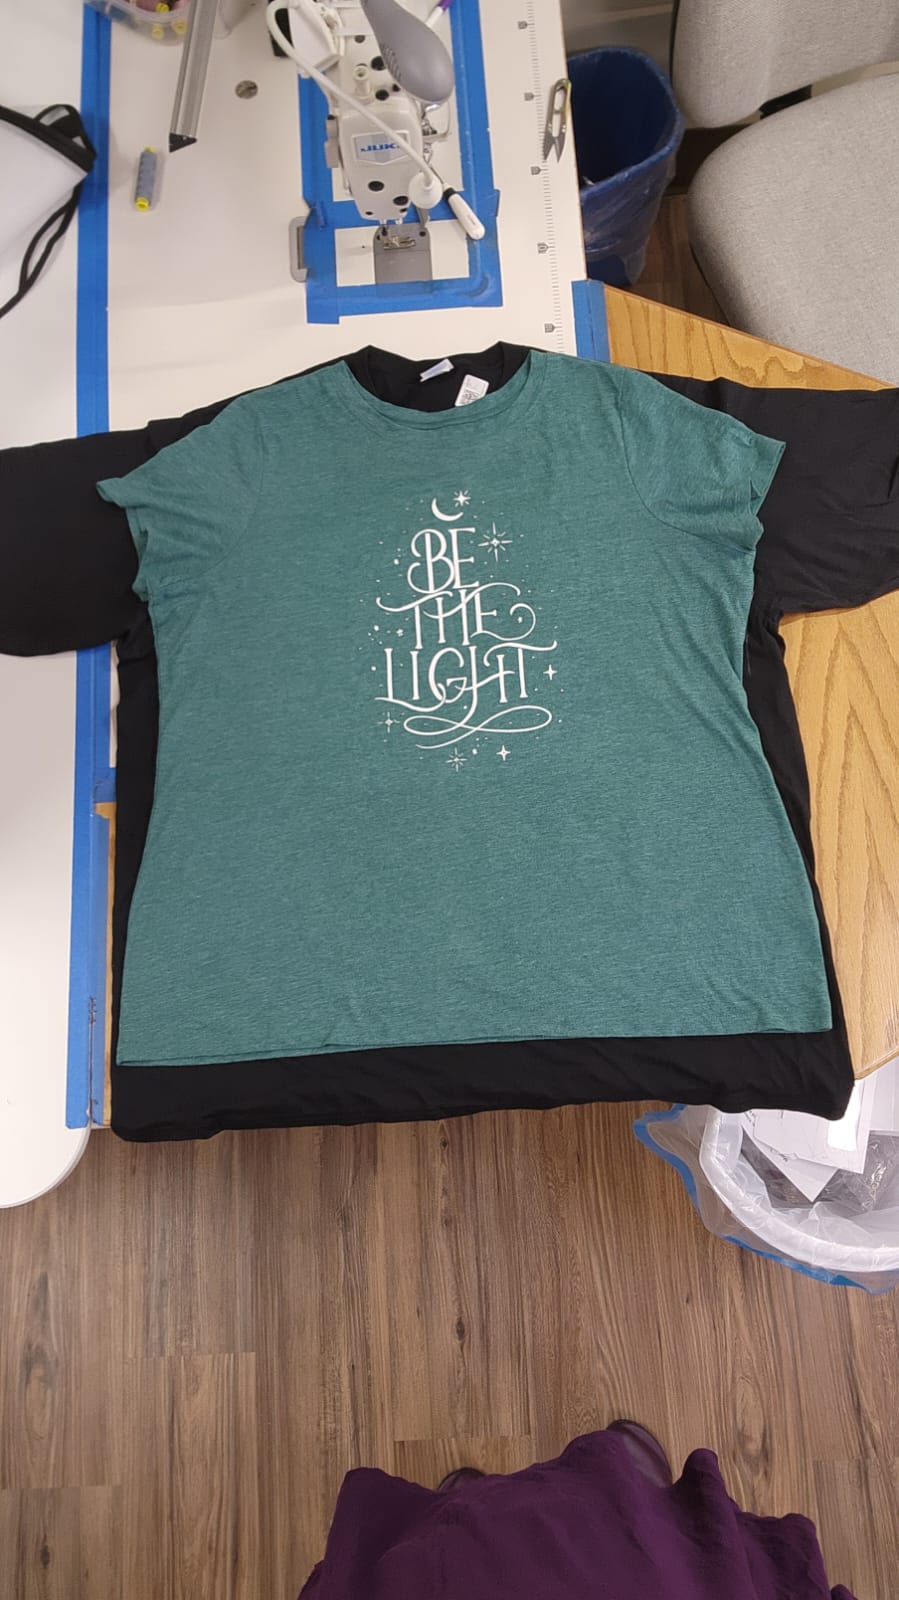
This isn't a full tutorial or anything, but here is how I took a Torrid shirt (the green shirt) and used the shape of it to alter a black shirt I got on the internet that was massive in the shoulders.

(1) The first thing I did is I laid out the shirts and roughly sketched out the shape of the seam lines of the Torrid shirt onto the black shirt with a fabric chalk. Notice in this picture how the hips are the same width, but the sleeves and shoulders of the black shirt are ridiculously wider than the green shirt.

(2) After I sketched the design onto the shirt, I did some measuring and decided to reshape the one side because I hadn't gotten the design quite symmetrical with the rough sketch. In some of the following images, you'll see how I used my french curve ruler to help get the shape of the lines correct.

(3) In this photo, I laid the hems of the shirt sleeves together because the circumference of the sleeves were similar. I put pins through both shirts so I could trace the pins on the black shirt like you see in the next photo.

(4) Pictured above is how I transferred the shape of the Torrid shirt over to the black shirt. I didn't think to take photos of doing this on the shoulder area, but I did the same process. I lined up the neck holes, centered over each other, I put pins along the armscye seam, and I transferred the marks to the black shirt.

(4) After I had the markings transferred from the green shirt to the black shirt, I set the green shirt aside, and used the pins to transfer the markings from the back of the t-shirt to the front of the t-shirt.

(4) I cut the sleeve off right along the original seam. Whenever I do alterations, as a general rule, we try not to cut fabric until absolutely necessary, as a little insurance policy that it could be put back the way it was originally. This allows for being able to try on the garment and make adjustments, in case our prep work didn't account for all the variables. In this garment, at this stage, I could safely return the sleeve to it's original position and the quarter inch of seam allowance I cut off would be so small a change that it wouldn't affect fit.

(5) I cut open the side seams also, up the center of the space, with the same idea of "insurance policy" against errors in judgment... just in case I was wildly wrong about how this would fit afterward. Part of the reason for such hesitancy is that the stretch of this fabric is different than the stretch of the Torrid shirt.
The following photos show the use of the french curve to double check the shape of the seams:


The process of attaching the sleeve:

(6) Here we can see the sleeve next to the armhole, and all the extra fabric that hasn't been cut out yet. At this point I transferred the markings of the sleeve tot he inside of the sleeve so that I would have a stitch line for where to sew after I pinned the marks together.

(7) Its a little challenging to pin the sleeve in, just because the curves are going opposite directions, but I wouldn't try to do this without pinning. Notice how the seam allowances are all over the place because they haven't been trimmed yet. Below you can see where the shoulder seam is located on the body of the shirt and where the fold is in the center of the sleeve for alignment. I pinned the centers together first and then worked my way outward from there.


(8) I stitched the side seams. Unfortunately, I didn't take photos of lining up or sewing the side seams. At the sides, I lined up the armpits and pinned those seams together, and then I pinned the hem of the sleeve and the bottom hem of the shirt together so those 3 points would be correct. Then I added pins throughout the rest of the side seams to be sure my stitch lines matched up.

(9) Before I cut any fabric out, I tried the shirt on to be sure I was happy with the fit. At this point, it could have been adjusted, but I didn't think that was necessary.
Tidying up the inside of the shirt:

You can see my pointer finger tucked under the seam allowance and that there is a seam along where my ring finger is located.


The final step was that I tacked the hems on the sleeves and the bottom of the shirt to lock in the serging stitches from unraveling and give those areas a little more finished look.
And that's how I made this shirt shaped like me!
Here's to better fitting T-shirts!
Cheers!
Topic in this post: #DayInTheLife, #AlterCasual
 Kristen sews because clothes don't come shaped like humans and people often think their bodies are the problem, which is a problem.
Skipped to the end? I get it!
Checkout our Everything Page. There are links to... well(?), everything! You'll find quick, free wins for sewing as well as Step-by-Step Trainings.
Our Everything Page
If you have any sewing friends, we'd love it if you would share our links!
(Want notes on our progress and courses available? Get on our email list!)
Learn: Your Free + Paid Resources | Join me on the Gram
Connect: Our Vault Lobby is open for discussion!
New User? Create an account here.
Comments
Must be Logged In to leave comments.
Search
Whether you're sewing or hiring a sewist, your clothing will be shaped like your undergarments. Therefore, it is imperative that you learn to buy the right bra. Checkout our post on bra fitting.
Hiring a Sewist?
Looking for Regular Clothing Alterations?
Sew with Us!
Submit sewing questions
with our video recorder
in Vault Lobby Chat!
Making Bras?
Here's My Bra Blog!
Blog Topics:
(Click to see posts.)
- #HiringASewist
- #ResourcesForOurBrides
- #DayInTheLife
- #EveryoneNeedsAlterations
- #SewWithUs
- #MachineMastery
- #SewingTechniques
- #FoundationalGarments
- #AlterCasual
- #AlterBusinessProfessional
- #AlterFormalwear
- #AlterOuterwear
- #OddSewingJobs


